This month I challenged the girls to incorporate their goals into their projects for the hop, a great way to start off the new year! I cannot wait to see what they've created, and hope you're inspired as well! We'll get right to it, here's this months' hop order:
Trisha: http://www.trisha-grace.blogspot.com/
Shay: http://www.sbookinshay29.blogspot.com
Amanda: http://www.somethingsorta.blogspot.com/
Jenny: http://mycreativelife29.blogspot.com/
Kristin: http://rukristin.blogspot.com/
Suz: http://livealifeextraordinary.blogspot.com/
Corinne: http://corinnesmilovici.blogspot.com/
Hope you all had a wonderful holiday season, happy new year!
Friday, December 28, 2012
Saturday, December 15, 2012
WINNERS!
I gave it a few extra days for all the SMB HoliDAYS giveaways to finish up, and today I'm back to announce the winners!
For the Forever Young & Crafty Lisa Bankes-Lahiff you are the winner of the giveaway bundle, thanks to your Facebook like entry! If you could send me an e-mail at sbookinshay29@aol.com, I can get your addy & send your goodies out to you!
For Rukristin Papercrafts, the Trendy Holiday Journaling Cards will be going to Melinda Thao, you're the lucky winner! If you could just send me an e-mail at sbookinshay29@aol.com, I will get your info to Kristin & she will be in contact shortly after to tell you how to go about getting your free download, congrats!
Thank you ladies for joining in on our fun, I hope we inspired you in some way with your holiday crafting! Make sure to check back on December 29th for our next blog hop! xoxo
Wednesday, December 12, 2012
Day 12: SMB HoliDAYS with Monica
Hello! I want to share a project my friend and I did yesterday – a Christmas wreath. Now, this was our first time attempting it, so it was definitely an experiment! I will share with you along the way things I may do differently next time and ways to make it easier!


You will need:
-A wreath (we used 14” straw wreaths, but next time I will definitely go with foam. They were too messy!)
-Vintage sewing patterns, coffee filters, or tissue paper
-Distress ink
-A circle cutter or template
-Scissors
-Adhesive (glue gun, E6000, Glossy Accents, etc.)
-Ribbon or lace
-A staple gun
-Accents such as ornaments, poinsettias, floral picks, holly berries, pinecones, etc.

The first step is to cut a nice big pile of circles from your sewing patterns or tissue paper. If you’re using coffee filters, this step is done for you! I don’t have a big circle cutter, so I used an old bowl as my template and cut with an exacto knife. This proved more difficult than I realized because the paper is so finicky, and there were a lot of wrinkles in it. It would probably be easier to just layer a bunch and cut with scissors. My circles ended up being about 6”.

Once you have a nice big pile of tissue paper circles, crumple each one up in your hand and ink the wrinkles with distress ink. I used Tim Holtz’s “walnut stain” color. This part proves messy! You may want to wear latex gloves.


When all circles are inked, smooth them out flat. Hold it in your left hand, using your right index finger to press down in the center of the circle and gather it into a ruffle flower shape. On the back side, pinch the gathered part into a little circle; this is where you will add the adhesive.
Note about adhesive: I chose to keep the plastic on my straw wreath. If you use a straw wreath, I would definitely recommend doing this! My friend took her plastic off, and straw ended up EVERYWHERE! Not kidding, every nook & cranny! The best thing is probably to just use a foam wreath. Since I kept the plastic on my wreath, I used E6000 glue because I was afraid hot glue would melt the plastic. My friend used hot glue on the straw. Both held great!

Begin adhering the ruffles to your wreath form. This is where you get to play and experiment! On mine, I just started my first row around the front center of the wreath, then a row more on the inside of the wreath. I sort of squished my ruffle flowers together, but you can get a different look by spreading them out. My friend did hers a little different, and I like how hers looked just as well! She staggered hers – so the first was more on the left, the next a bit toward the right, then one toward the left, and so on. Just play with it!

Before you know it, your wreath will be full! Check for bald spots – I definitely found some on mine. As I said, I ended up just doing a row around the front center and around the inside. If I had more patience, I think I would have also done another around the outside, but you can’t see it much from the front.

Let your adhesive dry a bit before doing the last step, which is adding the fun accents! First, you’ll want to use ribbon to make a hanger for your wreath. You can always just tie the ribbon around the top of your wreath, but I didn’t want my ruffle flowers crunched. So I used a staple gun to attach the lace to the back (I folded the lace over a few times to make it stronger). This worked great!
All of my accents I found at Walmart for just $1 apiece in the Christmas section! I first added the “Merry Christmas” ornament. I left the string hanger on it and attached it to the back with the staple gun. I like how this let the ornament hang freely! Then I added the pinecones and poinsettia with my E6000 glue. These came with cool clips to attach them with, but I couldn’t find anything sturdy to attach them to, so I just used glue. I glued the pinecones on top of the inside, so they look like they are just resting there.

And here it is hanging on our front door! I think what I love best about this, besides how pretty it looks ;), is that it cost only $6 to make! Most everything I already had on hand at home, so I just had to buy the wreath form and accents.
I would love to see yours if you decide to make one!
Tuesday, December 11, 2012
Happy H[OWL]iDAY #11 with Suz
Hi all! So happy that the holiday merry-making is in full force not only in our household but all around the world. I hope each of you have been finding time to document some of this merry-making, tree-trimming, and other holiday festivities amidst all of the hustle and bustle that the season brings.
I, myself, have been a busy lil ole elf, and have managed to produce a creative chaos craft storm in my scrap studio!! Lots of projects in the works, most of them for my guest designing at October Afternoon, but some of them just for the family and friends. Trying to squeeze in a little bit of Project Life too.
Today, I am sharing with you a holiday home decor project made with lots of October Afternoon goodies and my Silhouette.
It's a mixed media canvas owl. If I haven't mentioned it before, I am a collector/fan of owls. They are just so dang cute...and wise! ;)

This little guy is a mix of wisdom, merry, and don't mess with me-with his arched "eyebrows" made from a Silhouette leaf pattern design that I altered. I used my favorite textured woodgrain cardstock for the base of his body and patterned papers from the Make It Merry line and one pp from the Holidat Style line. I used the OA snowflake rub ons for his eyes/pupils and for his tail feathers I resized and grouped together a chevron pattern that I created in my Silhouette.
Super fun to put together and start-to-finish it only took about 2 hours. (The hand embroidery added a bit of time).
I machine stitched in white around his face.


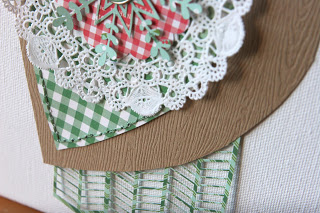

I think he will be perched in my scrap space or in our basement living room as we have various shades of green and red walls as a backdrop for for him. Appropriate camouflage, yes?
Happy hOWLidays y'all!
Suz
&& make sure to look out for her gorgeous designs
on the October Afternoon blog all month long ;]
Monday, December 10, 2012
SMB HoliDAYS #10 with Amanda
Amanda's here today to bring you another GORGEOUS project, I want one of these babies myself!
Hope you enjoy it as well, and are having a wonderful December!
It's day 10 of our HoliDAY projects and today I have an Advent
calendar for you! There are countless ways to make an advent calendar
from envelopes to stockings to post it notes but for today I kept it
fairly traditional.


I started with this bare wood Advent calendar from KaiserCraft which
comes in several pieces. I primed everything and then painted with two
coats of aqua acrylic paint. Once everything was dry and put together,
it was time to decorate!


I used mostly Crate Paper Sleigh Ride for this whole project, except
for the larger background papers which are from Glitz and Pink
Paislee.

I used the print & cut feature on the Cameo to create these tickets
for daily activities to do with my son this Holiday season. A few days
have surprise candy instead of activities, because lets face it, what
kid doesn't like a little candy now and then!?
--Amanda--
Sunday, December 9, 2012
HoliDAY #9: Gift Tags with Trisha
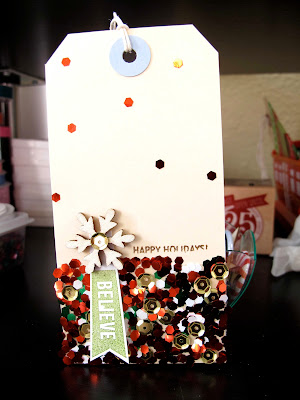
Welcome to day 9! For today's HoliDAY project, it is going to be about gift tags and SEQUINS! I want to show you how I created this holiday tag. This would be a perfect holiday touch for your presents or inserts for your December Daily.


Try to use different sizes of the double-sided tape to create different thickness. I hope you enjoy today's project. If you have any question, please leave a comment and I will response to them as soon as possible. Have a great holiday!

I learned this trick from Amy Tan when I took her class at Paper Tales last year. She showed us an easy way to adhere sequins. The trick is to use double sided tape! The best one that I have used is American Crafts This to That Double-Sided Red Tape. Or you can use any double-sided tape that you have. Here's how I did it.
 |
I wanted the tag to look as if you dipped the tag in sequins. I used three strips of double-sided tape to create that thickness. Then, I poured the small sequins first. The bigger sequins second and lastly the smaller sequins to fill in the empty spaces. There aren't any particular order to put the sequins, this is just the way I did it.


For the final step, I just tap or flick the tag to get rid of the extra sequins. Don't forget to fix some of the sequins because some of them might be standing up, instead of laying flat. That's it, now you can decorate them to your own liking. :)

Here are some more tag that I made using this trick.
 |
| I used one strip of double-sided tape. |
 |
You can even create your own glitter tape! |
Friday, December 7, 2012
HoliDAY #8: Gift Wrap with Jenny
Jenny's bringing you quite a few inspiring packages today---
Who loves Pinterest?!? Me! Me! Me! I saw and pinned a bunch of gift wrap ideas
and thought I would try some out using scrapbooking products.


I used Stamps, Misters, Washi, Twine, foam trees, pearls/bling, Stickers,
glitter tape, and Ribbon. If you have any questions please leave a comment and I
will answer them. Thank you for stopping by!!
JennyHoliDAY #7 with Kristin
Hi Everyone! Kristin here today sharing an envelope mini-book that I created to hold all my holiday notes and memorabilia.
I've made these envelope books the past couple of years to hold all of my holiday information. It's really useful to have a place to keep all my to-do lists; receipts, a calender, and a place to hide my gift list.
There isn't anything super fancy about this project; just a Basically Bare krafty keepsakes album decorated up. I did make sure to cover both sides of the envelopes with patterned paper to give the book a bit more strength. I plan on using it throughout the season, so I'd like it to be extra sturdy.
Thanks very much for stopping by!
.jpg)


Thursday, December 6, 2012
SMB HoliDAYS Day 6 with Corinne.
hello holiday lovers!
Up for Day 6 is the lovely Corinne, who made us two hanukias for Hannukah which begins on December 8th. First up is one she made with items most of us have around the house-- paper towel rolls, some sequins and her beloved Cameo:


The second one is made with glass candles that she decorated with glitter and glue some dreidles with the words in hebrew. I hope you all enjoy seeing these gorgeous projects from Corinne today ;]
Wednesday, December 5, 2012
SMB HoliDAYS Day 5 with Suz.
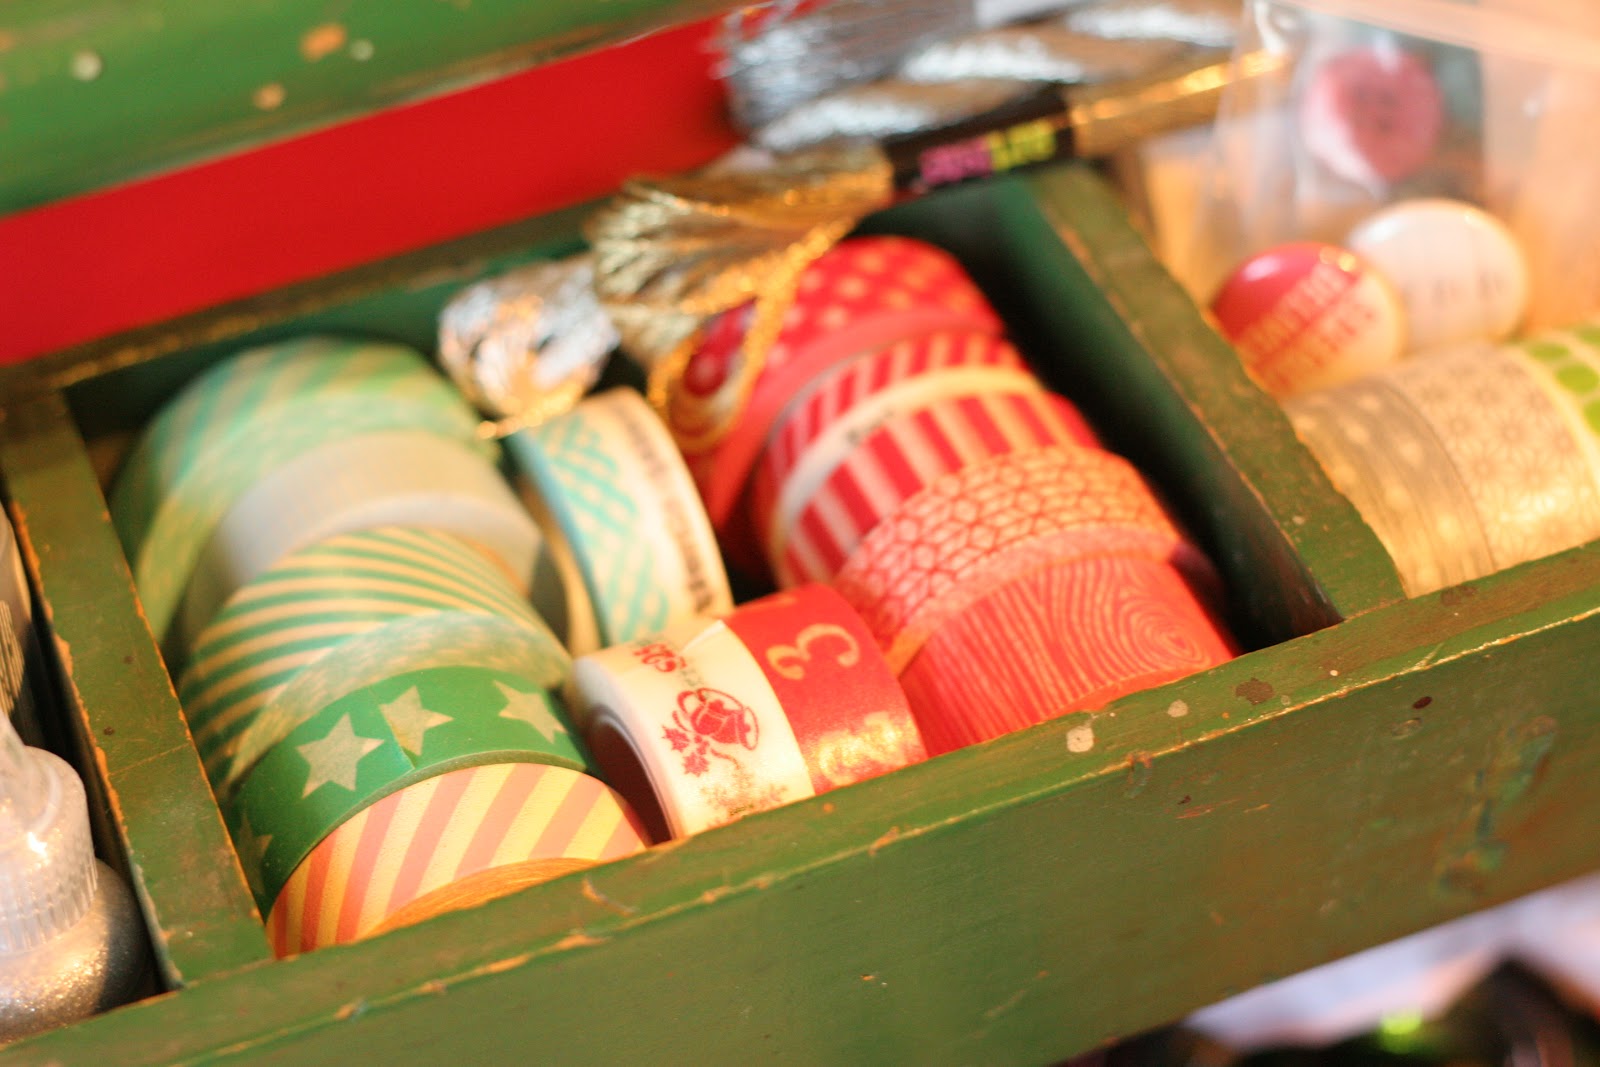
Happy Holidays y'all!! Suz here with you sharing a few pics of my holiday scrappy storage (per lovely Lady Shay's request). ;)


First off is my "Big Green" tool tote. I picked this up a few Black Fridays past at a local antique/thrift store. I loved the colors, the cubbies, and the functionality of it all. My hubby raised an eyebrow when he saw it enter the house, but I gave him the confident "I-know-just-the-place-and-use-for-this-don't-worry-my-dear" look and went on my way. ;)
Top left, is my spray mist/Stickles cubby. Followed left to right by my washi cubby, embellishment cubby, and embossing cubby. The lower large cubby contains a variety of holiday stamps, patterned paper collections, chipboard and rub-ons, as well as various trims. I love having all of it at arm's reach while I have my back-up scrappy stash on & or around my desk and on my mobile scrappy station, shown here:


I found this scrap station at a local thrift store and knew it had to come home with me. Super sturdy, with drawers that hold huge amounts of 12x12 and larger scrap items; like Hambly transparancies (miss that company so), Project Life page protectors, patterned paper, and cardstock. I love that I can lock the drawers too (bc sometimes I like to be able to not share my secret stash of sweets -like Dove Peppermint Bark Promises! ;)
Above the drawers are cubbies that fit baskets that I change out for the seasons. In these baskets I store my acrylic stamps collection, stamping block, wet wipes and stamp cleaning supplies. The top of my station holds my vintage typewriter, my roundabout Harbor Freight tiered storage, and my grandmother's sewing machine. I especially love that it is set on casters, so I can move it around my scrap studio pretty easily. Some days I roll it around the room to face the tv so I can type, scrap, or sew from it. I don't usually scrap standing, but for whatever reason, I do like to use my sewing machine & typewriter standing (well at least for scrappy stuff, that is!).


How do you or have you set up your holiday scrappy spots? Does it differ from your usual system? Link us up or comment below with the ways in which you keep your holiday crafting organized.
Happy #5 Y'all!
Suz
Subscribe to:
Posts (Atom)